Microphones
What is a sound? What is a diaphragm of a mic? What's the difference between Condenser mic,Dynamic and Ribbon?
To understand how microphones work and all the differences between them it is essential to define better what a sound is and how it is perceived by
our ears.
A sound is nothing but a change in the pressure of the air,in fact,for example,when we sing we provoke a movement of the air which results in waves with peaks and troughs exactly as a stone thrown into a pond.
When these waves reach our ears cause our eardrums to vibrate and our brain read it as sound.
Well,the diaphragm of a microphone is exactly as an eardrum , works precisely in the same way and it's important to keep in mind,to understand later what phasing problems means,that it moves in two different directions depending on which extremities of the wave will reach it (peak or trough).
Therefore all the different kinds of microphones have this in common:the diaphragm,which can be small(less than ! inch in diameter) ,large(at least 1 inch big) or medium(their upper and lower limits have not been decided yet,because they are starting to be used quite recently,but they are approximately between small and large).
Hence, to explain better what the main differences between them are about,it's worth to introduce another concept:what does it mean transducer?
A transducer is a device which converts one form of energy to another.Microphones are transducers that convert a sound or more precisely sound pressure waves, to an electrical one exactly as ,in a way,our brain converts or,more correctly,translates the vibrations of our eardrums as sound.
The speakers instead,do exactly the opposite:reconvert the electrical energy in acoustical.
There are many ways to transduce the sound,from diaphragm vibrations to electrical energy,and it is due to this reason that there are many various types of microphones. with different characteristics.
Condenser microphones

Condenser or capacitor microphones use a capacitor to convert sound into an electrical signal.
A capacitor is a device used to store an electric charge,formed by at least two conductors separated by an insulator.For this purpose,as conductors, these mics ,have inside two plates,of which the external one is the diaphragm,made of a very delicate material with a certain voltage between them,which is provided by a battery or external phantom power(48v).When the diaphragm vibrates due to the sound waves,its distance from the other plate changes ,changing the capacitance as well:further =decrease in capacitance=discharge current;closer=increase in capacitance=charge current.
The electret condensers are basically the same except for the fact that they are provided of a permanent voltage inside them,so that they don't required any external power (although good ones have preamplifiers which still required it).
Other characteristics between different types of condensers,concern the possibilities to have high filters included,different polar patterns and an attenuation switch or ATT.
Polar Patterns:
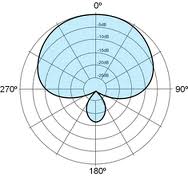
- Cardioid,Supercardioid and Hypercardoid
The origin of this name is due to the graphic representation of its pattern which has the shape of an heart
(cardia from greek=heart).This pattern permits to pick up just the sound in front of the mic ,rejecting all the others from the sides and the rear,for this reason it is very used for multi-miking placements and when one wants to avoid to pick up room-ambience sound or wants to have the possibility to use the proximity effect(emphasis of bass response when the sound source is closer to the mic)typical of cardioids and almost absent while using omni patterns .
Moreover there are two kind of patterns that are even more directional then a simple cardioid one ,called
Supercardioid and Hypercardioid. The last one is,as the name suggests,the most directional of all.
It's very important to remember that these two patterns,although they are so focused on one precise direction,have a funny characteristic that can be very tricky sometimes,that is a
Moreover there are two kind of patterns that are even more directional then a simple cardioid one ,called
Supercardioid and Hypercardioid. The last one is,as the name suggests,the most directional of all.
It's very important to remember that these two patterns,although they are so focused on one precise direction,have a funny characteristic that can be very tricky sometimes,that is a small rear section which slightly picks up sound too.
-Figure-8 or bi-directional
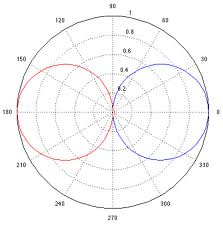
This pattern permits to pick up the sounds from the rear and the front of the mic equally,but leaving out all the others coming from the sides.It's very useful to record two singers for example.
Omnidirectional
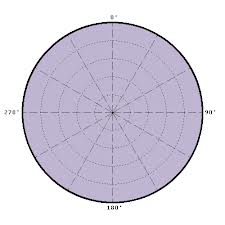
This pattern permits to pick up the sound equally from all directions and exhibits a very small proximity effects.It is obviously the best choice to record room ambience .
Modular microphones
These mics have a switch that gives the possibility to interchange various capsules so as to use the polar pattern desired amongst all the over cited:cardioid,omni or figure 8 .
-Attenuation switch
This switch permits to decrease the level of the input considerably.The number of decibels written on it corresponds to how many decibels the sound will be attenuated and often,in Condenser mics it is around 10 dB.
This switch is very useful,for example,using a Condenser to record drums or other instruments with a loud sound as electric guitar or bass amps.
This switch is very useful,for example,using a Condenser to record drums or other instruments with a loud sound as electric guitar or bass amps.
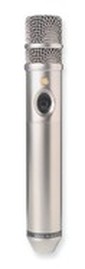
Small Diaphragm Condenser
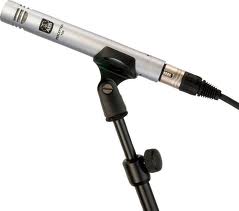
They have the best transient response (ability to reproduce high frequencies) and,for this reason,they are very good at recoding instruments with sharp transients or prolonged overtones as ,acoustic guitars,strings,drum overheads, hi -hat,harps or the higher strings of an acoustic pianos.As all condenser mics they are very fragile and can't cope with very heigh volumes for their sensitiveness,so they are mostly used in studios or in particular live performances as orchestral ones or acoustic.
Large Diaphragm Condenser
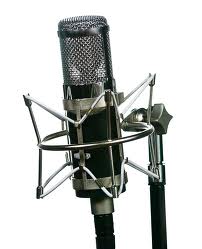
These mics have a smaller transient response than small diaphragm ones,but have the characteristic to give a rounder,warmer sound and it' s due to this reason that they are the most used for vocals,Jazz guitars,lead guitar/vocal arrangements or mixed with dynamic ones while recording all the other electric instruments ,to add more shades as warmth or room ambience,according to the sound that one is looking for having the possibility to use the attenuation switch (ATT) for loud sound sources.They are very delicate and ,differently from dynamics that are not so sensitive to be affected,require shock mount to avoid unwanted noises provoked by vibrations of the floor passing through the stand so as to reach directly the microphone.Moreover,they require a pop shield for recording vocals,for the "P"or" SH" sounds otherwise will make distortions.
For exactly the same reason explained for small Condensers they are mostly used in studios and very rarely in live performances.
For exactly the same reason explained for small Condensers they are mostly used in studios and very rarely in live performances.
Medium Diaphragm
Their diaphragm diameter size is in between 5/8" and3/4" and they have started being used quite recently.They have some characteristic of both Large and Small Diaphragm.
Dynamic Microphones
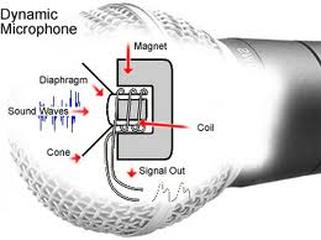
These microphones use,to convert acoustical energy into electrical,the electric current generated by a conductor wire coil moving within a magnetic field,as a matter of fact, in these mics the diaphragm is made of a very thin material and is attached to the coil so as,when it is struck by sound waves,the coil moves accordingly and ,interacting with the magnet,generates a small electric current,which is nothing but the audio signal passing through the mic wires.
Hence,for their different transducer system,they don't require any external power or battery.
These mics are incredibly resistant and can handle very high volumes,although their quality of sound is less accurate than that of Condensers.
These characteristics make them perfect to be used on live performances and for very loud instruments such as snare and kick drums or bass and guitar amps.
Moreover,as for Condensers,there are generally two types of Dynamics:Small diaphragm(mainly used for vocals and guitar amps) and Large diaphragm(perfect for kick drums,snare drums,bass amps and many other sound sources with a strong sound).
Ribbon microphones
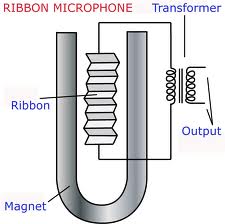
These microphones convert acoustical energy by electromagnetic induction,as a matter of fact they are defined as a very particular and unique type of Dynamic.
The difference between the two indeed,consists in the fact that what makes their very thin diaphragm move is not sound pressure as for normal Dynamics,but the changes of velocity of air particles.
Their diaphragm is a very light ribbon made often by aluminum,suspended within a magnetic field,between two magnetic poles and as it moves,it generates a small electric current which coincides with these variations of velocity.This kind of mic also needs a preamp to boost its tiny signal and it's very important to choose it accurately.Moreover,they are known for reproducing an incredibly detailed ,warm and smooth sound and ,due to the extreme thinness of their ribbon diaphragm,they are able to pick up fast transients,so as to handle high frequencies very well,being ideal for recording brass ,percussions and vocals,although they are known as well to be the most delicate ,sensitive and fragile kind of microphones.Another essential particularity of these mics is that to have a natural figure- 8 polar pattern by design,due to their ribbon diaphragm responding to sounds coming both from the back and the front.
Producer Flood and Sontronics ribbon mics for recording PJ Harvey mercury prized "Let England Shake"
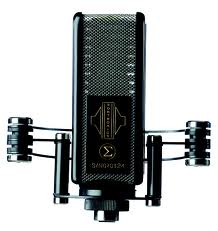
I highly recommend to read this article about producer Flood (aka Mark Ellis),who produced artists as PJ Harvey,Sigur Ross,Nick Cave,Depeche Mode) and his experience with Sontronics ribbon mics,to have an idea of which particular sound these mics can create: http://www.sontronics.com/interview_flood.htm
and to have a listen to PJ Harvey's album "Let England Shake"which was recorded only with Sontronics Ribbon microphones.
and to have a listen to PJ Harvey's album "Let England Shake"which was recorded only with Sontronics Ribbon microphones.
How to record an electric guitar
First important things
- Chose a guitar that suits more for the sound you are looking for,and an amp as well after having make a deep research.(this is my personal opinion,for example I like so much the telecaster guitar of Anna Calvi with her unique sound and reverb,as well as the lowed guitars of Joshua Homme in the "Desert sessions"so I would like to make a research to find out how they reached these particular sounds..) .
- Hopefully tune the guitar at your best! :)
Your amp levels do not have to be raging to capture a great electric guitar sound.as long as the amp is loud enough to create a good tone,it has done its job,and all you need to do its capture it.
- Select the microphones and plug them in (Condenser,Dynamic and Ribbon if there is the possibility)
- Locate the speaker ,or the different speakers if it has more than one, on your amp.
- if you have multiple speakers, you can experiment with placing the mic on each and listening to determine which one sounds the best cause even if it seems strange,it is not uncommon to find one that sounds noticebly better than the others.
Position and mic options
Positioning the mic in different locations can allow you to change the basic sound with no adjustment to the amp, and without changing microphones.
Then,talking about choosing the mic type,it really depends on which kind of sound you are looking for,but I can say that if,for instance you want to
reach a more believable sense of space and ambient you can try placing a condenser a bit far from the amp(ex 80 cm) at first and listening to how it sounds and if it is the ambient sound that you was looking for,of if you want experiment moving it closer or further till you ill reach what you want,and for this kind of sounds the condenser is better than the dynamic because of its increasing definition to the sound capturing all the different shades of the sound of the room,while a dynamic it s perfect to be placed very close to the amp speaker for its ability to bear high sound levels and for its solid sound .
In general there are 5 basic positions that can be mixed together in different ways and double tracked as well if desired to research about the sound you like the best for what are you recording ,although there is no end to experimentation.
These positions are:
- Center
The closer to the center the brighter tone .
- On and Off axis
On-axis means pointed directly at the source of sound(at 90 degrees from the grill cloth);, while angling the microphone so that it is at a 45 degree angle relative to the grille cloth would normally be "off-axis".
Off-axis means that the mic pointed at the source of sound angled 45 degrees approximately from the grille cloth.You can try both listening to the different sound they produce,for example,if you place a mic on one side edge of the speaker using the off-axis position,so with the mic pointing towards the center it might be useful to capture a sound that will have some characteristics of the "center" position,as the brightness ,and some of the edge,as a warmer sound.So lets experiment to sort out how many different quality of sound you can reach in this way!
- Edge
If you place the microphone on one edge of the speaker you will get a darker sound,if you move from here gradually toward the center listening to how the sound changes getting closer the center you will notice that it will lose progressively its darkness and mybe warmness ,gaining more brightness.Therefore,depending on which kind of colours of sound you' re looking for,you will decide which position will suit you more,and it will be more interesting if you try to use 2 mics in different positions.
- Far
Generally it works best with condenser mics which ,in fact ,can capture in a very clean way all the shades of the ambient sound,rather then dynamic.
While putting the mic within an inch or two of the grille cloth is the most common technique, don't be afraid to experiment with more distant microphone placements.
As you move the microphone further away from the speaker, it begins to capture more ambience, room reflections and reverb. This can help you achieve a sense of "depth" to your recordings. Be careful with this though - once it's captured as part of the recording, it will be impossible to "remove" that ambience later. If you have enough microphones, you can use two microphones; positioning one mic in close, with a second mic further from the amp - sometimes this second mic can be several feet away, depending on the sound of the room and your preferences. Record each mic to a separate track so that you can blend them to taste at mixdown.
- Rear
It works best with open back cabs and it allows to capture deep lows,but it lacks hi's.
It is very interesting to mix rear and front positions together because the rear one give a very warm body at your sound.
Conclusions
The important thing to remember is to get the sound happening in the room, and then if it doesn't sound good on the recording, try a different microphone or move the mic until you find a "sweet spot" where what you hear is what you're after.
How to record an electric bass
The first important things to remember about recording an acoustic guitar apply as well to recording an electric bass except for a new element that we can use to this purpose : The DI Box(Direct Imput box).
In fact generally there are four primary methods used today to capture the sound of an electric bass:
- Direct Imput
If your recorder or computer interface has a HighZ (high impede dance)input you can plug your bass or pedal effects directly into it and if you don't have it you can use a Direct Box that converts the bass signal's impedance so it can be recorded through a mic or line input on a n audio interface or mixing console.
It is very important when you do it to learn how to add a bit of plugin Compression and EQ to get the best sound from your recording,for that reason it is very important to make further researches about these two new concept that are just introduced here:
- Dynamic range compression, also called DRC(often seen in DVD and car CD player settings) or simplycompression reduces the volume of loud sounds or amplifies quiet sounds by narrowing or "compressing" an audio signal's dynamic range, commonly used in soundrecording and reproduction and broadcasting.
- EQ or equalization that is the process of adjusting the balance between frequency components within an electronic signal.
- Direct with amp simulation software or hardware
After having plug the bass into a DI box or High input you can decide to process the signal with an amp sim software that allow you to monitor the processed audio while you record.
You can also make two tracks duplicating the DI unaffected and using the second to process it with the sim amp and then mix the two maybe to find interesting sounds.
But if you decide to use an amp sim hardware ,such as simulation pedals or desktop modeling boxes ,rather then a amp sim software,you have to be careful because once you record the sound,you can not change it anymore,as if it was a real amp.
- Miked bass amp
In this case the basic principles for the different sounds you can get,are very similar to those of guitar,but for a few different things:
- Some bass amp cabinets contain small tweeters so ,depending on their location,if you move the microphone towards the edge of the cone,closest to the tweeter(that generally are in the upper right) you can obtain a brighter sound instead of a warmer because of it,so you have to be careful locating the speakers and the tweeters in your amp.
- Usually the rear position is not used so often as for guitar because for bass it doesn't work so good.
- Microphones used:
Condenser NKT Rhode,TLM102 Neumann
Large diaphragm Dynamic Audio-Technica ATM250,SenheiserMD421,Audix D6,Electro-Voice RE20,AKG D112
You can choose the microphone you like more and try to combine different positions recording them on different tracks
- Combination of all DI methods and miked bass amp
You can try to blend these different methods together recording all on many different tracks,and learning how to mix properly you will achieve many different possible shades of sound.
How to record vocals
-Choose your mic
Generally Condenser mics are considered as the best choice to record vocals because of their sensitiveness and their much better frequency and transient response,although it is not wholly true. In fact if we,by any chance,have to record the voice of a singer who has a very loud way of singing,
as for exemple a punky wild singer,with a lot of dynamic as well,we will need to use maybe a good dynamic for its being less sensitive and more suitable for these kind of sounds,rather than a condenser that would distort the sound at one point .
In anycase you have to use a shock mount(to decouple the mic from the mics stand and the environment and minimaze the floor noise) and a pop shield about 3 inches from the mic (to avoid plosives and spitty sounds that can cause distortions).
Here there is a list of just a few good condenser and dynamic mics for recording vocal for example:Rode NT2,RodeNT1-A,NeumannU87,SeElectronic SE2200,AKGc214,AudioTechnicaAT4040SM(good for backing vocals),SM7B Shure(very characteristic for Rap).
- Recording location
The room has a big influence on the sound so there are a few basic suggestion to find out what is the best place to set your mic.
Its important to put the mic well away from any wall and ,above all,it's essential not to have a reflective area directly behind the singer.
If you are going to record not in a proper studio,you should experiment with carpet on the floor,duvets on the walls to find the right balance of sound,,and even reflective pannels,although it could sound contradictory,because sometime you have to absorb some sound as well as reinforce some other that has been affected , too lowed or even deleted while absorbing the others.
If you are recording in a proper studio basiclay you can start setting up your mic a couple of feet away from the center of the room,as any standing waves will be in phase at this point, and this will tend to exaggerate the room resonances in the recording.
Now ,if,experimenting, you'll notice something that you don't like,you can modify this position till you'll find the sound that you are looking for,but generally this works very well.
Now you can make a rough test recording to find out if it works all right and if it is not the problem to sort out will lay on the mic placement or on the room.
- Recording process
The first thing to do is setting the right levels asking the singer to sing what it is going to be record and adjusting the gain on the mix consequently..
Yet sometimes it is very difficult to do it because the human voice is extremely dynamic and can changes a lot from whispers to screams.
One solution to this problem is to use a little bit of compression(2:1Ratio,-30db threshold, 1-1,5 sec rate for example) directly after the preamp to lower automatically the the volume when the input exceeds a certain threshold,although one has to be very careful doing it because once you record with compression,you can't change it anymore.
Another way,maybe the more easy one,is to record at much a low level so that the highest peak will never go into red with a good mic,a nice preamp,but loud enough to have a good signal into your gain meter.
For our first assignment we will be asked to record without compression and to make it later in the post processing.
Therefore the most important aspects to focus on during the recording process are:
-Mic sensitivity(choosing the right mic according to the kind of vocalist and performance you are going to record).
-Pre-amp trim level (That I mentioned before while talking about adjusting the gain to set the levels).
-Use of a proper mic techniques by the singer.
This last thing is very important because with a good mic technique the singer can reach already a great sound levels even without compression,EQ and other plug-in ,while it is very difficult to adjust a bad recording trying to find a good sound using a lot of things in the post processing,that's why it's good to linger over this point.
Any singer has a different voice with different shades and dynamics,so any singer has to find his own way to sing with a mic and his own sounds.
With that in mind there are a few basic things to know about it:
-A good starting position is directly on axis with the mouth from 6 to 12 inches away from the mic although placements above or below the mouth can result in different vocal characters which may be interesting for certain voices,and although there are different off-axis mic placements to expriment to reach different sounds.
-For a soft,sensitive,intimate voice the singer has to come very close to the mic as 4-max6 inches away,while when singing aloud the singer shold back away a few inches from the starting position mentioned before.
-Proximity effect:tendency of some microphones(mostly cardioid)to exaggerate the bass frequencies of a vocal when the singer get very close to it.
The most of times the proximity effect is not wanted,although sometime it is used to add some useful bass-end reinforcement and consequently a bit more vocal weight to a singer with a very quiet voice,or it's useful to reach a particular sound for a particular song.
-Playing with distance to find different quality of sound,for example,if we'll try to record placing the singer 3 or 4 feet distant from the mic,a lot of the room sound will be captured (especially by certain condenser),and sometimes it is actually very good ,instead of using reverb and other effects,just to put the singer further and listen to how the room sound will work with the singing.
So ,in the same way we could experiment with the other possibilities of distance and this is a useful tool that has not to be forgot.
- A little help that could be given to make the singer feel more comfortable and deliver a better performance is to put a bit of compressor and reverb on the monitor bus,therefore it won't be recorded but will be able to make the vocalist feel more at his ease calling up maybe a different singing style for soft,intimate part and letting then the artist hear all the little shades of his/her voice and being more relaxed and connected to the song.
But it is completely up to the artist and his/her needs and everyone is different,that's why it is very important to establish a good communication between the artist and the producer or the sound engineer,to create the best conditions to work together.
Now,after a few tests recording have been made,checking the waveform and also comparing the record with the acoustic sound of the voice to be conscious about wanted or unwanted differences ,if we are satisfied with the the sound we reached,we can record our track and move on the second step.
-Post processing
To have a well recorded vocal track it is essential to have a even level and above all a good tonal and level balance and a right reverberant ambience according to the song we are working on, the style,the artist,the project and the voice.
To get to it we can use a variety of processing and mixing effects to reach the final sound we are looking for.
I will try just to introduce some very basic concepts about it because ,at this stage ,I am not able yet to go through this part of the recording techniques in a deeper way,so, I will introduce a little bit what Compression and EQ are,while for other effects as reverb,etc for the moment I can just suggest to use your preset plug-in in your software and listen to how they sound on your record and decide by your personal taste what you want to add.
-Compression:Noise floor threshold , Rate,Threshold, Ratio,Attack,Release,Output.
The Compression is used for evening the peaks and dips in the recording and when one will be more expert in this subject will be able to experiment trying many different hardware and software compressors till will be sure to have the right one,because each situation is unique and different from the others as each voice,artist and project is unique and different.
With that in mind,lets go through a rough analysis of the main concepts that I understood through the help of a very clear explanation on the tweakheadz website while I was struggling to get to these notions.
Compressors add noise to a signal and,using a strong word,"destroy" dynamic range.
The noise is managed by gating the signal and when it goes below a predetermined threshold the audio signal is muted.This is very useful to eliminate all the unwanted low level noises as ,for example,the movements of the singer,the bleeding from the headphones,etc.
-Noise floor threshold
The noise floor threshold gets rid of all the signal when dipping below the threshold that can be set from -50db to -10 db.A good position cold be at -30db but it depends on
each particular case,in fact one has has to be very careful because, if the gate is set too high ,the attack of the words may be cut off ore come too abruptly.
- Rate parameter
The rate parameter fades out the signal as it gets close to the gate.It is very useful to prevent the gate from cutting off the end of the world.
Good set-up suggested to start: 1-1,5 sec.
-Threshold
When you set the threshold you decide from which point the signal will be compressed at a certain "ratio"(concept that I'll explain after).
For example,if we set the threshold to -15 it means that when the signal will go beyond -15 will be compressed,while,till -15 will remain without.
A good suggested starting point is -10.
-Ratio
To explain this notion it is better to look directly to some examples:
If we set the ratio to 10:1 it means that for every 10 decibels of gain the meter would only go up 1 decibel where 10= decibels IN and 1=decibels OUT.
So it will take 10 db of sound energy to raise the output meter by just 1db,intact basically everything will be divided by 10 so that the dynamic range will be shorten and the level evener.
Ex If a singer that was singing at -10db suddenly gets 20 db louder without compression the output meter would post +10db,but with a compression ratio of 10:1 it would post at -8db.
A good suggested starting point is 2:1.
-Attack and Release
This setting ,if used improperly,can delete the effect if compression on the attack or make it hold on to long on release,that's why it is suggested, at this stage,to use a fast attack and release time of around a quarter of second.
-Output
This is the final adjustment that has to be done because sometime the compression lowers the overall signal so that it may be needed to boost it back up,although it shoudn't go over 0db.
- Record two track for very different parts of a song or duplicate one after that it has been recorded.
Some section of a song can be sang louder(for example chorus) and in this case you might decide to record them separately on two different track to match their level more easily,or,after having recorded everything onto one track,divide it in different parts and then move the part you want to work separately into a new track.In this way you will have the possibility to use two different compression settings (or even two completely different compressors)on the two tracks.
- Equalization:filters,frequency,gain,bandwidth
An equalizer alters the tonal quality of audio by applying gain to a specific frequency range.
It makes it by using a number of filter circuits which are able to apply gain within specific frequency ranges.
A positive gain is referred to a "boost"while a negative gain to a "cut".
Filters commonly used for equalization:
-High pass filters or low-cut filers and low pass filters os high-cut filters,shelving filters and peaking filters.
A high-pass filter gradually reduces the level of any audio frequencies below a predetermined frequency, while leaving the level of those above this point unchanged.
The low-pass filter reduces the level of frequencies above a chosen point, leaving those below unchanged.
This two kind of filters above are really useful for "cutting",while for "boosting"another kind of filters is commonly used:shelving filters.
"A shelving filter is designed to apply an equal gain change to all frequencies beyond a preselected shelving frequency, rather than applying a progressive gain change beyond a cutoff point. Such filters require not only a control for selecting the shelving frequency, but also one for selecting the amount of cut or boost applied".(Paul White).They are very useful manly for gentle,overall tonal adjustments,while for more selective "surgical" adjustments one has to use the peaking filters.
Indeed peaking filters are used for advanced application where it is necessary to focus on a very specific frequency band with greater accuracy,selectively emphasizing or attenuating a limited band of the audio spectrum.
There are at least two control to work with this filter:one is to set the applied gain and the second is to specify the centre frequency of the band to be treated.
How to combine all this filters for each specific project and each specific case is one of the most important thing to learn how to Equalize properly.
Now I will introduce the other three main concept of EQ.
-Frequency
The frequency determines where in a tonal spectrum an adjustment occurs.Low frequencies=bass sounds.High frequencies=treble.
-Gain
The gain determines the magnitude of the adjustment.Positive values increase signal level and refer to "boost".Negative values decrease signal level
and refer to "cut".
-Bandwidth
The bandwidth or Q(of EQ) allows us to choose the range of neighboring frequencies that our adjustment affects.
Higher Q values=fewer frequencies=narrow filter
Lower Q values= more frequencies= wide filter
It is suggested the most of time and particularly for vocals to "cut narrow and boost wide" because a wide EQ cut would remove more signal ,affecting the overall character of the sound and maybe just if you are looking to a particular effect could be good,but not for the most of the mixing cases.Narrow cuts instead are very useful to remove "problem frequencies" such a ringing overtones for example,in a surgical way,without changing
the sound's defining characteristics.
On the other hand ,although it can be confusing,narrow EQ boosts usually sound unnatural for the human ears while wide boosts much more natural and well suitable because human brains evolved an innate understanding of the harmonic series and narrow EQ boosts affect specific harmonics, producing timbres that we sense can’t possibly have occurred naturally.
That keep in mind,if we are looking to particular sounds that we think the mix requires,we don't have to follow this rules all the time,but,once become
more expert in it,just experiment trusting on our ears,listening to all variations we can have and choosing with time and patience.
Now ,one has to be very careful about equalizing voice because if it is done improperly or when it is not really needed can affect tangibly the sound of the voice and it will even sound as someone else's voice than the one of the singer with whom we are working.
That's way is important to keep in mind that there are just a few reason to decide to use EQ on a vocal track:
-To make the voice sound more balanced in the mix
-To fix a particular problem
-To produce an intentional sound effect
And it's important to remind the "cut narrow and boost wide " rule to be gentle while boosting.
Another thing that can help to a male voice is a low cut filter,in fact,for example,if you go up from 125Hz to150 and you will get rid of
undesirable noises as pops,breath rumble,etc without affecting the sound,although sometimes,since our ears adjust so quickly to new sounds,there is the risk to lose to much body of voice using too much high-pass,for this reason is good,using a Bypass option,to replay back often the original track without EQ.
To reduce nasal sound,on the contrary,it can help dipping a few db around 1kz and moving the centre frequency up or down to locate the problematic point.
How to record acoustic guitar
About recording an acoustic guitar ,the most important thing is to reach the best sound possible at source,just choosing the right positions on the room for the guitarist,the best microphones depending on which shades of sound we prefer and the best mics placement.
This is essential because it's better,as for the human voice,to try to avoid EQ ,Compression and plug in as much as we can,to keep this delicate sound the most natural possible and the closest to the acoustic sound we hear on the room,therefore I will start this paragraph posing attention to these 3 vital concepts.
In addition ,it is not recommended to use the DI with this delicate instrument for the guitars that have a piezo transducer as well,because,in this way,only the vibrations of the strings will be amplified,while all the other shades of sound from the resonant body of the guitar and the audio reflections of the room will be lost so that the recording will result much more inaccurate than that achieved using good microphones in right positions.That kept in mind,in many pop productions,where a certain accuracy for acoustic guitar is not demanded,the DI is used ,although it is nearly always combined with microphones.
- How to choose the best position for the guitarist according to the size and the acoustic of the room?
Small studio room can lack of natural reverb and in the most of cases, to fix this problem,people recurs to a little bit of artificial reverb,although it should be better to try to achieve it experimenting in other ways,as,for example,finding for the guitarist,some reflective panels to play close and moving them till you'll get a sound that's good both to the guitarist and to you.
on the other hand,if you're recording to a big studio,it's worthwhile to spend sometime listening carefully to the sound of the guitar in the room trying different positions to chose the one which suits he best you and the musician.
-Microphones:which type,which polar pattern?
One have to choose the mic according to which sound he's looking for ,with how many mics he is going to record and which position they are going to be placed.
As a general rule Condenser mics are considered the best to record acoustic guitar for their much better frequency and transient response that keeps to a much more detailed sound.That said,if large or small diaphragm,that's really depend on which kind of sound you are after.
Small diaphragm mics are known to have a better transient response and so the ability to catch a more detailed sound on high frequencies although
less round,while large diaphragm,with their slower transient response,produce a less detailed high frequencies sound,but with a warmer and more colored timbre.
Therefore the mic choice also depends on the circumstances in which you are recording,for example,if you are going to record with just one mic,and your room is quite big,a good choice could be a big diaphragm condenser set on the omnidirectional pattern,to capture both the direct sound from the guitar and the room ambience,for example,while, if your room is tiny a cardioid pattern is better.Moreover,if you have to record in a situation that demands extreme accuracy,as a chamber orchestra recording,the best choice will be using two matched-pair microphones(two identical mics that have been certified to produce exactly the same frequency response),while,if you have to record a guitar whose sound will be mixed with other different instruments with a dense sound as drum and bass for pop, rock or country productions,maybe a small condenser mic will be the right one to reach a good balanced overall sound of the song.
Large diaphragms, on the other hand are often the best choice for lean guitar vocal arrangements or Jazz guitar projects.
Moreover ,there are many different types of microphones that can be matched to lead to great interesting sounds, and , at the end ,the most important thing it's to try to know as much different mics as possible so that one can experiment using also different models together to achieve to his aim in the best way.
Small-diaphragm condenser suggested:AKG C480B(modular mic +high pass filters included),NeumannKM184(great for his ability to avoid boominess),DPA 4011,Shure SM81,AKG C1000S,AudioTechnica AT3528(these last three are less expensive and good as well,although a bit different from the first..)
Large Diaphragm suggested ones:Lawson L47MP,Manley Reference Gold,Rode NT2A,Studio Projects C3,Shure KSM32.
-Mics placement using one or more mics:
-Recording acoustic guitar using just one mic
Although in live music usually the guitar is amplified pointing a mic to its sound hole(to have a good level,to avoid feedback and keep the sound of it well separated from that of the other instrument)and using compressor and EQ to fix the boominess of sound and try to recuperate the missed high frequencies,this is not recommended at all while recording in studio,in fact in this case we can use different positions that can lead to a better result because the guitar is played alone in a room with a great acoustic.
The best position suggested, to capture a good balanced sound from each part of the instrument and the room ambience is to put the mic approximately 40 cm from the guitar,pointing the 12th fret.This is a good starting point,in fact,if you need,you can try to modify a little bit this position to get to the sound you like more,keeping in mind that if the mic is closer to the neck will catch a brighter,although less warm,sound,while if it is closer the sound hole it will be warmer and more full-bodied,more over if the mic is further from guitar it will capture more room ambience,while if it's closer the sound will be drier.
That's way ,if you want the sound of a closer mic to the guitar,but with room ambience as well,and you want to record with just one mic,a good advice could be to use a modular mic set on omnidirectional pattern.
-Recording with more mics
Using more mics will allow you to create a more detailed and full-bodied sound at the same time,blending the sounds coming from all the resonant parts of the guitar with the room ambience as well when desired.In fact,in this way ,one can reach the wanted balance of sound picking up the brightness from the neck resonances,the warmth and fullness from them of the sound hole area and the spaciousness from the room sound.
Having said that,there are a few problems that this recording technique can cause that are to be avoided:phasing problems or mono compatibility.
What phasing problems mean
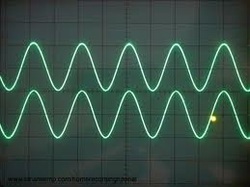
To understand what phase cancellation means and how it modifies the sound of a recording ,it is essential to go back to the definition of "sound" that I treated at the beginning in the first paragraph concerning the microphones researches,in fact,if we think about the sound as being waves created by the pressure of air that make our eardrums vibrate as well as the diaphragms of microphones,we can figure out better what happens when two signals are in phase or out of phase.
In fact,when to signals are in phase it means that,if we think about waves moving in one direction as those provoked by a stone thrown into a pond,the peaks and the troughs of the two signals are perfectly matching each other,so,for example, if two signals from a same source of sound,are captured by two microphones and are in phase, the resultant amplitude of the overall sound will be the sum of the two and
so will be the final sound you will hear from your monitors,their waves raising and falling definitely at the some time.
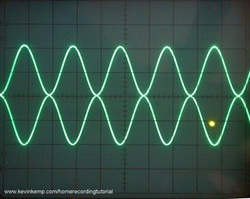
But when two signals are completely out of phase the resultant sound will be silence,as a matter of fact in this case the peaks of one signal is touching the troughs of the other and this conflict, where two signal
of exactly the same frequencies are involved,as two forces of the same power set one against the other in exactly the same direction,will lead to a cancellation of movement,therefore of sound.
It generally happens when more microphones set to catch the sound of a same source are located in different places of the room and the sound will reach each mic at a different time,so that maybe one will pick up the sound at the trough of a waveform while another at the top.
Obviously these examples are the most extreme possibilities we can find,in fact signals can be partial out of phase causing a thin or boosted sound from the overall level of the combined signals.
There are different ways to fix these phasing problems depending on each different situation,in fact sometimes one can identify the problem immediately,while recording,so that can just try to move the microphones till it's corrected,or flipping the phase on the mic or on the input,while other times the problem come out just at the end,while mixing,
and in this case one can fix it trying to correct the waveforms moving it a little bit directly on the DAW(Digital Audio Workstation)or using plug-in alignments,but ,for now ,I will tackle just the mic placing, mentioning the 3:1 rule.
This rule helps to minimize phase cancellations and means that if you are using two mics to record the same instrument, you have to put the second one farther from the first three time the distance that the first one is from the source.for example,if the first mic is 20 cm distant from the source ,the second one has to be placed 60 cm farther from the first one.
Having said that,one can experiment by himself,breaking the rules and getting great sounds as well with experience,patience and passion!
-Mics placement:three basic positions
Generally when you decide to put the microphones close to the sound source,it is better to use a cardioid pattern because of its ability to exhibit less bass proximity effect, and the distance used the most is about between 15cm and 30cm from the source.That kept in mind let's go through the analysis of three basic positions.
-1 Stereo :first mic pointing at the 12th fret,second, at the bridge with approximately the same distances from the instrument
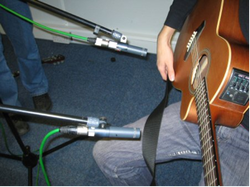
While using this technique it's very important to follow the 3 to 1 rule in order to avoid phasing problems.
This position permits to have as final result a very balanced sound which comprehends both the warmth of the sound coming from the bridge and the brightness of the one from the neck.
This position permits to have as final result a very balanced sound which comprehends both the warmth of the sound coming from the bridge and the brightness of the one from the neck.
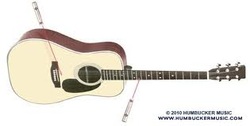
-2 Spaced pair: first mic pointing the 12th fret,second one at the performer's ear level pointing down either at the sound hole or at the bridge,for right handed guitarists on the right shoulders while for left handed one,on the left.
This technique is good if you are after an opener and brighter sound,although it will result thinner than the stereo one.
Another essential thing to remember while trying both these positions it's to slightly move the mics,listening to the different results coming from changing the basic positions just a few inches,in order to obtain the best sound for you.These positions in fact are a kind of starting points from which one can starts to experiment.
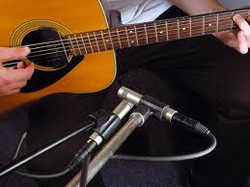
-3 XY technique or coincident pair
The two mics are placed together ,with their capsules almost touching,forming an angle of about 90 to 120 degrees,with one capsule above the other.in this case one has not to bother about phasing problems and about following the 3 to 1 rule because the sound will be captured by the two capsules approximately at the same time,due to their being positioned so close to each other,basically in the same point.
According to the distance you will place the mics from the guitar the sound will change shades,in fact,if you will decide to put the two mics around 16 cm far from the 12th fret you maybe will obtain a sound with less midranges frequencies,pointing the two mics,one at the sound hole,the other towards the neck,but rich in low ,warm sounds and bright ones,while,if you will place the mic further away,as around 50 cm,maybe the sound will result with more natural,picking up the two mics more room ambience and midrange frequencies.However it's really up to you to experiment with all these positions in order to obtain the best result according to the type of sound you are looking for.
How to record drums
There are many way to record drums depending on which kind of sound one is after,for example,if one listens to the album "Is this desire" of PJ Harvey,surly will notice that each songs has a very different drums sound according to the different atmospheres created.
Having said that,in this paragraph I have decided to show just t basic ways to record drums,according to the level of my studies concerning this subject.
-Recording drums using just one microphone
Drums are made of different percussions assembled together:bass drum,snare,tom-toms,floor tom,hi-hat and cymbals.
Percussions are very transient rich and loud at the same time so to record drums with just one mic the best choice will be a Large Diaphragm Condenser provided with an -10 attenuation switch,as a matter of fact this microphone will permit to capture both the high frequencies from the cymbals, the hi-hat and the snare drums,and the lower ones from the other percussions as the Bass drum,the tom-toms and the tom floor,using the attenuation switch to avoid any distortion that would be generated by the loudness of the instruments
A very good mic placement for this purpose is to put,following the T Chad Blake method, the Condenser over the Bass drum,pointing towards the snare,as it 's showed on this video
http://www.youtube.com/watch?v=iS_YZpn818A
using the cardioid polar pattern,since,although the mike will be pointing just to the snare drum,there will be enough spilling sounds from all the other parts of the drum so that the overall sound will result well balanced at the end.
Another way to capture a good overall sound is to place a Condenser mic, overhead either in front or behind the drums and ,for this purpose ,large diaphragm are the preferred in the most of cases although small diaphragm ones can work equally well if not better sometimes,depending on the quality of mic we are using,the location and many other factors.
Good microphones to use in these cases:Neuman U87,TLM170,TLM103,KM 84,KM184,AKG C414B,C300B,C400B,C100S,C451,Sennheiser E664,Audio Technica AT4003
-Stereo miking
It will be worthwhile as well,to experiment a little bit placing two mics overhead ,each one covering half of the drums ,in order to catch up a well balanced sound by mixing their two ones,without worrying about having them perfectly symmetrical,for the best balance of sound will be reached just spending a bit of time moving them around a little and listening,till the best position will be found,but keep in mind that in this way the lower sounds won't be picked up so much.
Moreover it is important to know in general,how the sound is radiated by each part of the drum kit to decide the best position according to your needs,as,for example,while the cymbals generate a sound that comes from above and below the plate,the hi hat sound spreads horizontally,so if you want the cymbals to sound less you will have to place the mic closer to their plane,while if you want the hi hat a bit quieter you will have to bring the mic slightly up or down its plate.
- Recording each part if the drum separately using many different microphones
This is the best way to reach a well balanced sound which will include all the different shades of each singular part of the drum.
- Bass or Kick Drum
- Microphones choice
To record the kick drum it is necessary to use a microphone able to reproduce low frequencies withstanding very loud sounds,so a microphone that has to be robust of which ability to reproduce detailed high frequencies is not required at all as a good big diaphragm Dynamic one such as the AKGD112,Audix D6 or Shure Beta 52 A for example.
- Mics placement
A very common and efficacious way to accomplish this task,is that of placing the mic inside the front head,through the hole (hoping that there will be one!) pointing at the beater,or a little off axis,depending on which result you will prefer.It is necessary to considerate too that if the mic is too close to the beater the resultant sound will lack of some shades of the full drum's resonance,while the click of the beater will be too much present,so it's up to you to find the right distance between the mic and the beater according to your needs.
Otherwise,if you place the microphone outside the shell,maybe you will reach a great natural kick drum sound ,but it will be the risk to pick up to much bleed from the other parts of the drum and not to have a good definition of the beater.
Another solution to these problems can be that to place two different mics,one inside the outer head,close to the beater while the other outside the shell , to mix ,eventually,them together.
-Snare drum
-Microphones choice
There are many different kind of microphones that can be used to record snare drums according to the kind of sound which would suit your project the best.If you listen to "Let England Shake",for instance,you will surely notice the particular "vintage" sound of the snare drum,due to the use of an high quality ribbon microphone as the Sontronics is.Moreover ,you will notice as well that the style in which the drums are played doesn't require very loud,noisy beats differently from Heavy metal or Hard Rock styles.
So you will chose between a Dynamic(small or large) ,a Large condenser(as AKG C451) or a Ribbon ,depending on the the particular needs of your song,although it's suggested to start experimenting with a good Dynamic one as a Shure SM57 to avoid the damages that an inexpert sound engineer together with a young and wild drummer would produce on very expensive and fragile mics as the over mentioned ones!
-Mics placement
A good position to start with it's to angle the microphone 45° into the head of the drum,using the cardioid or hypercardioid pattern,keeping in mind that,if you will put it closer to the center you will get a better attack and more resonance while if you will place it closer the edge you will get a rounder sound full of harmonics.
Another option to add one more shade to the final sound,it's that of putting another microphone under the snare,pointing up.
In this way you will emphasize the rattle of the snare,but make sure to switch the phase of the microphones below because its diaphragm
will vibrate obviously in the opposite direction of that of the other above.
- Hi - Hat
- Microphones choice
The best choice to amplify an hi-hat is a good small condenser microphone for its excellent transient response.as a matter of fact the hi-hat sound is full of high frequencies.
- Microphone placement
A good position,to avoid that the air puff coming out when the two plates of the hi-hat close,it's to put the microphone,switched on a cardioid pattern,perpendicular,approximately 10 cm above,pointing to the further edge from the snare.Then,either if you move the mic closer to the center or if you experiment different angle sizes,the sound will change slightly and it is entirely up to you to try different positions in order to find the one that will lead to the best result for your project.
Moreover some engineers prefere to put the microphone under the hi-hat rather than above,according to different techniques,but ,for the moment,being mine just an introduction,I will conclude this little paragraph here.

- Toms
-Microphones choice
Dynamic microphones are often a good choice to capture a full,well balanced tom's sound,especially for certain genres as hard rock or metal,although I could say here exactly the same things I said before about the snare drum.
As a matter of fact expert sound engineers sometimes decide to use condenser mics and even ribbon ones according to particular situations.
Good dynamic microphones used for this purpose:Audix i5,Shure SM57,Senheiser MD421.
Good clip-on dynamic mics: Senheiser E604 ,Beyer dynamic Opus 62 (cheaper then the Senheiser)
Good clip-on condenser:AKG C519 (very good for brass as well)
- Microphones placement
Once again you can apply for the toms exactly the same rules mentioned for the snare drum.Therefore if you will angle the microphone toward the center you will get great attack sound while if you will angle it more toward the edge you will reach more harmonics and your sound will gain more resonance,although the attack will be less present.
As for the snare drum,if you want you can try to experiment placing other two microphones underneath and listening to the different shades that they will reach.As a matter of fact in this way you will probably catch an even more resonant sound ,but the attack will be much more weaker in comparison with the one captured by the mic set above.Keep in mind ,once again, that ,if you want to experiment in this way, you have to switch the phase of the microphones underneath in order to avoid phase cancellation.
Moreover for Jazz music this method is not the best one,because the overall sound of the drums will result too aggressive,therefore many engineers in this cases prefer not to mic them separately,considering the mics overhead enough strong to capture a well balanced,soft,overall sound.Furthermore others producers prefer to use just one Condenser placed over the toms with a very wide cardioid pattern in order to obtain a sound that is something in between the two above.
Hence each specific situation requires a specific approach,therefore it is very important to understand well the needs of the particular project you are going to work on.

- Overheads
- Microphones choice
To capture a well balanced overall drums sound and to reproduce the highest frequencies of the cymbals Condenser microphones are obviously the best choice.Moreover ,since small diaphragm Condensers are well-known to have the best transient response, they are the most used for this particular purpose.
- Microphones placement:two basic techniques
-XY technique
This technique ,as I explained before with regard to acoustic guitar mic placement,is the best to avoid phasing problems concerning stereo mic techniques.
If you want to try to use it on drums overheads you have just to place the mics beside each others,forming an angle of about 90 degrees between them,as it is shown on the picture beside,and placing them approximately 150 cm off the floor,above the snare and kick drum,as explained in this video http://www.youtube.com/watch?feature=player_embedded&v=aD_IPYqN9Vk#!
- A/B technique or spaced pair
A very easy way to catch a good overall and cymbal sound it is to place one microphone over each cymbal,following the 3:1 rule in order to avoid phasing problems.
- Room Ambience
After having placed microphones on each single element of the drum kit,it will be very interesting to experiment a little bit,trying to catch the room ambience according to the way that will suit your project the best.
-Microphones choice
Often Large diaphragm Condensers and Ribbons work very well for this purpose for their warmth and their ability to catch the most of shades of sound.
Having said that,you can experiment with any kind of microphones,because ,even a Dynamic as the most common Shure SM57,for instance,placed in front of the drums,pointing towards the ceiling,can catch an interesting room ambience.
-Microphones placement
Here there are a few suggestions that I have found while researching about this subject:
If you want to catch an overall drums sound,without picking too much sound from the room,you can try pacing a Large Condenser in front of thee drums approximately at waist level.
If you want to add an extra stereo dimension to the overall sound,yo should try to place to Condenser in the upper corners of the room.
Anyway,if you really want to catch the best room ambience ,you should be patient and experiment till the demands of your song will be satisfied,because each room is different and unique, as each drums and each musician are and,above all,each song.
Sound recording history: development of recording equipment and studio practices from the first analogue recorder to our contemporaries digital recording studios.
Acoustical recording
The first recording techniques relied on a completely mechanical process which consisted in trying to record the changes of air pressure made by a sound, that are the sound waves , straight into a recording medium.To do so it was necessary to find something that could act as our eardrums,something that ,reached by the sound waves ,would have vibrated . Hence the concept of diaphragm was born, concept that was essential also for the invention of the microphones and consequently of the future electrical recording. Then it was conceived the idea of using a stylus directly attached to the diaphragm in order to record in form of graphics at first and grooves later on its movements generated by the sound waves.
The recording medium in which the stylus etched grooves changed through the time. At the beginning it was indeed a rotating cylinder and the stylus used to record vertically ( cylinder based Phonograph),changing the depth of the groove,but then it was changed in a flat disk with the cutting needle recording horizontally (gramophone).
Moreover ,in order to catch the sound in the best way possible, the diaphragm was located into the apex of a cone and the person who was generating the sound had to stay close to the other side.
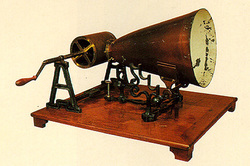
- Phonoautograph, Phonograph, Gramophone
Now that I have given a general explanation of how the first acoustical recording machines used to work I will show more in detail the first recording devices invented along with the time they were generated and the name of their inventors in order to show more clearly how the development happened in the acoustical recording .
- Phonoautograph
This device was created by Edouard-leon Scott Martinville in 1857 and was the first recording machine invented.
It was able to record the sound waves in form of a graphic by a stylus attached at the diaphragm which drew a line on a paper adhering the rotating cylinder.it was very useful to study the sound waves,but it couldn't play them back.
Fai clic qui per effettuare modifiche.
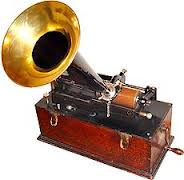
-Phonograph
Created by Thomas Edison in 1878 this device was an improved phono autograph where the stylus instead of just tracing a line would be able to imprint grooves on a particular material covering the cylinder, often made by wax or tin foil.The different depths of the grooves coincided with the different sound waves generated.This enabled the machine to play back the sound recorded by inverting this process that is amplifying with mechanical equipment ,the sound waves generated by the vibrations of the diaphragm provoked in turn by the stylus tracing the grooves previously etched while recording.
But the main problem of this machines was the difficulty to mass produce their cylinders due to their complex features .
Fai clic qui per effettuare modifiche.
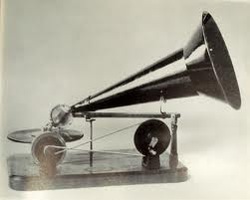
- Gramophone
The gramophone was invented by Emile Berliner in 1887 and differed from Edison's phonograph just for its way to record horizontally on a rotating flat disc instead of vertically on a moving cylinder,as I mentioned before.
The main advantage of using these discs lied on the fact that their could be facilely mass-produced at low costs in comparison to the cylinders of the previous phonograph. As a matter of fact ,after 1929 , cylinders weren't produced anymore.
Electrical recording
It was thanks for the researches made by the engineers of the giant american telephone company "Western Electric" if the first electrical recordings were released in 1925 by the two most important american record companies ( Columbia record company and Victor talking machine company).
The advent of the microphones improved enormously the quality of the recordings as the "horn sound" generated by the previous use of the cone was eliminated and the range of audio frequencies that could be recorded increased considerably. Basically now the sound was transformed into an electric signal b a microphone and then amplified to eventually make the cutting needle moving and recording more accurately.
- First " over-dubbing" attempts
The first over- dubbing attempts consisted in recording at first one session on a disc and then playing it back to play another session over it so as to record both on another disc. In the late 1920's the Victor talking machine company was the first company that released records made through this technique , but it was Les Paul's experimentations in the late 1940's through the reel to reel analogue audio tape that improving considerably multitrack recording techniques ,also called "sound on sound" technique, lead to a true revolution on the world of sound recording.
Magnetic recording
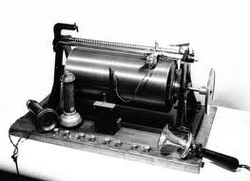
1898 Valdemar Poulsen's telegraphone was the first device using a magnetizable medium to record.
It can be said to be the ancestor of the later magnetic tape recorder. Basically Poulsen found a way to convert an electric signal to a pattern of magnetization and vice versa.
However telegraphone system could evolve into the first proper magnetic recorder ,called wire recorder just through the advent of electronic amplification in the 1920's and became popular between the 1940's and the 1950's, especially for voice recording.The advantage of the wire recording, over the gramophone was that it could be possible to have much longer recording over the steel wire than the disc, although its format was very uncomfortable and the quality of the recordings was still too low in comparison to the one of the gramophone. It was indeed the invention of the magnetic tape and its evolution through the years along with the improvement of discs materials to make a real difference and to then permit an expansion of the recording industry .
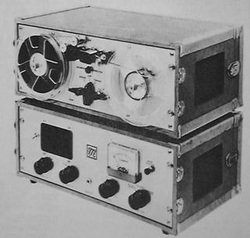
In 1935 AEG (german electricity company) engineers along with german chemical industry IG Farben researchers produced the "K1",the first magnetic tape recorder. It was then improved ,during World War
II ,by the use of the AC biasing technique, applied the first time by engineer Walter Weber when working for the Reich-Rundfunk-Gesellshaft.This technique indeed greatly improved the quality of the recordings. German engineers were indeed the forerunners of John Mullin 's 1947 magnetic tape recorder. As a matter of fact Mullin spent two years studying and researching on AEG magneto phones
taken from a german studio at the end of the war before coming out to give demonstrations of his improved machine in 1947 at Hollywood studios that gave him the chance to start an important collaboration with the famous singer and actor Bing Crosby . Crosby was indeed the first music celebrity to use magnetic tape recorders and, what is more, in order to do so , spent 50 ,000 $ into Ampex devices playing so a central role with Mullin in the development of this new recording technique and revolutionizing also the world of radio broadcasting and music.
The development of the magnetic tape was also essential for the improvement of multi- tracking techniques as I mentioned before talking about Les Paul's "sound on sound". As a matter of fact the tape could be divided into multiple tracks that could be so perfectly synchronized with each others,and again it has to be said that the first development on this matter is to be retraced in an invention made by german engineers in World War II . These engineers created indeed a two -track recording in 1943 that permitted to record two different signals from two different microphones at the same time. This technique , called Stereo ,was then developed and improved by the Ampex and other companies and in the 1950's was widely adopted for recording especially classical music and radio programs.
It is also in the early 1950's that the first eight tracks recorder was invented by Ampex and bought by Les Paul who started researching with it, revolutionizing so multi tracking - recording techniques for ever through his impressive over-dubbing experimentations.
Another further development of multi tracking - technique was the invention of the "bouncing down" technique that consisted in recording divers tracks using a 4 track recorder and mixing them to then bouncing them down into one track of another four- track recorder and so forth.
London 's Abbey Road studios would adopt this technique to record many different complex albums in the 1960's , involving bands such as The Beatles and the Rolling Stones. In 1953 there was even an attempt to create the first surround sound called "quadraphonic "sound.Unfortunately it was too expensive and didn't have much success in the market.
Another great advantage of magnetic tape was that it was also very manageable for editing processes for it could be cut and spliced very easily , allowing this way to make much more sophisticated records than in the past.
The Vinyl

Although the recording process from the 1950's was made through magnetic tapes, the consumer format adopted remained that of the disc until the 1980's. As a matter of fact all the recordings were transferred to disc to be then mass- produced and sold in shops. The reason laid in in the fact that many improvements had been achieved concerning the material of which discs were made ,from the invention of the first gramophone to the advent of magnetic tape recorder in 1947 and in 1948 the LP disc (Long Plain) or 33⅓ rpm (revolutions per minute) format ,introduced by Columbia records ,was doubtlessly the best choice in terms of quality of sound ,length and cost of materials. The LP was made indeed of a new material called vinyl which was much more resistant and able to reproduce a better quality sound than the abrasive shellac used before for the 78 rpm discs,which tended to be noisier and much more fragile. Moreover the 33⅓ rpm format allowed ,with its slow rotation,to have approximately 25 minutes of music on each side of the disc ,hence one can imagine how innovative it could be in comparison with the 5 minutes of the 78 rpm . As a matter of fact the previous pop"albums" that consisted in albums which contained several 78 rpm record sleeves,with he advent of the LP could now be recorded just into one disc.
Another new format released at that time was the 45 s EP (extended play) introduced in 1949 by the RCA. It allowed to reproduce approximately two tracks on each side and for that reason it was adopted mainly to release collections of singles.
In 1957 moreover , the Audio fidelity records put the first stereophonic discs on the market and stereo format became so successful that just ten years later monaural discs were not produced anymore. By then,indeed , stereophonic discs were affordable by the most of people .
All these technologic improvements from the 1945 led so to an incredible expansion of the music industry and consequently to a diffusion of new genres of music never experienced before. It led indeed also to the beginning of the "globalization"of music.
The Neve 8078 console

"The Neve has incredible character, probably too much character" (Butch Vig, Sound City )
This console was one of the best analogue console ever existed,created in the 1970's by engineer Rupert Neve. Unfortunately just a few 8078s have been made,because of the costs implied by its production in terms of money and time. But the quality of sound that was achieved by using this machine was superb and the studios that adopted this console became famous for the quality of their productions as ,for instance, the Sound City studio which gained notoriety for having recorded artists such as Fletwood Mac, Cheap Trick , Santana,Rick Springfield, Neil Young, Tom Pretty and the Heartbrackers and even more recent as Nirvana,Metallica, Queen of the Stone age and Kings of Leon.
This console was one of the best analogue console ever existed,created in the 1970's by engineer Rupert Neve. Unfortunately just a few 8078s have been made,because of the costs implied by its production in terms of money and time. But the quality of sound that was achieved by using this machine was superb and the studios that adopted this console became famous for the quality of their productions as ,for instance, the Sound City studio which gained notoriety for having recorded artists such as Fletwood Mac, Cheap Trick , Santana,Rick Springfield, Neil Young, Tom Pretty and the Heartbrackers and even more recent as Nirvana,Metallica, Queen of the Stone age and Kings of Leon.
Compact Cassette
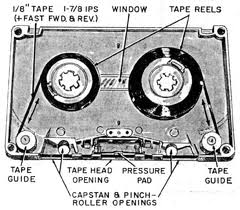
In the early 1960's Philips introduced a new recording format: the compact cassette,along with the cassette player.
It consisted on a magnetic tape recording format and was conceived to solve all the problems concerning the disc format as the loss of quality of the sound when played many times,the fragility and the dimension.
Later Philips created also stereo compact cassette and it led to a great improvement of quality .
The compact cassette replaced slowly the LP on the market and lasted for many years . It took a while indeed for the new digital formats to completely displace the audio cassette .
Digital recording
CONVERTING SOUND INTO NUMBERS
In a digital recording system, sound is stored and manipulated as a stream of discrete numbers, each number representing the air pressure at a particular time. The numbers are generated by a microphone connected to a circuit called an ANALOG TO DIGITAL CONVERTER, or ADC. Each number is called a SAMPLE, and the number of samples taken per second is the SAMPLE RATE. Ultimately, the numbers will be converted back into sound by a DIGITAL TO ANALOG CONVERTER or DAC, connected to a loudspeaker.(Peter Elsea 1996 http://artsites.ucsc.edu/ems/Music/tech_background/TE-16/teces_16.html).
Therefore the main difference from analogue systems is that digital recorders record the numbers in which sound waves have been converted into an hard disk,instead of recording them as a pattern of magnetization into a tape.
The more numbers are taken in a second the more accurate will be the sound recorded. That's why "When you sample the wave with an analog-to-digital converter, you have control over two variables:
The first digital devices could record at a maximum sample rate of 44,100 samples per record that was certainly a great result since the calculated simple rate through which a human ear perceives sound is 40 kHz , but nowadays it is possible to record even at higher sample rates,up to 192kHz.
A s a matter of fact a standard set commonly used nowadays is 48 kHz sample rate and 24 bit depth, for it is a good compromise between quality and usability. (http://www.bbc.co.uk/learningzone/clips/recording-sound-analogue-vs-digital/5977.htm)
However the first digital recorders weren't very good because ,although they could reach higher levels , the most of the times would record at a low sample rate and bit depth since the hard disks of these machines couldn't store big amount of data yet.
The first experiments undertaken with the aim to create good quality sound digital recorders were in Japan in the 1960's.Then in the 70s a few companies such as Mitsubishi ,Soundstream and Denon put on the market the first PCM digital recorders .
The digital consumer formats ,as well as the technologies applied in the digital recording devices ,have been subjected to many changes through the years before the advent of the Compact Disc, to begin with the Betamax VCRs and follow with the Digital Audio Tape (DAT),the Digital Compact cassette (DCC) and the Mini Disc.
With regard to the recording desk using VHS it has to be mentioned the famous ADAT recorder introduced in 1991 and still present nowadays.
However,at the present day computer based digital audio workstation (DAW) are the principal recording devices used, since the improvements reached by the computer science concerning the computers speed and storage capacity have permitted to achieve incredible results in terms of accuracy of sound never reached before, a sound even clearer than the one a human ear can perceive.
Moreover ,another advantage of using digital technology is that a digital record can be both copied and played back infinite times without having any loss of quality whereas an analog record couldn't.
In addition ,for what concerns editing and processing,it can be said that the digital era led to an authentic revolution with all the programs such as Pro Tools ,Ableton,Cubabase,Logic,etc able to make any sort of operations in a faster ,preciser and easier way in comparison to the old analogue operations made by hand.Furthermore a new world of sounds has been generated by these new technologies: software instruments, midi, samples...Electronic music has been subjected to an impressive development.
By now it is also very common to buy music directly from the web ,in digital formats such as MP3 or Wav. Maybe even the CD is going to disappear soon?
The transformation generated by the new digital recording technologies is really impressive also with regard to the home studios. As a matter of fact now everyone can create a personal home studio spending a very low amount of money .
But why, although the sound recording development produced by the advent of the digital technologies is undeniable ,are many people (myself included) still so moved by the peculiar and inspiring sound of the recordings of the 50's,60's and 70's? And why are many engineers working so hard to try to reproduce "vintage" sounds through digital software plug in and effects?
In a digital recording system, sound is stored and manipulated as a stream of discrete numbers, each number representing the air pressure at a particular time. The numbers are generated by a microphone connected to a circuit called an ANALOG TO DIGITAL CONVERTER, or ADC. Each number is called a SAMPLE, and the number of samples taken per second is the SAMPLE RATE. Ultimately, the numbers will be converted back into sound by a DIGITAL TO ANALOG CONVERTER or DAC, connected to a loudspeaker.(Peter Elsea 1996 http://artsites.ucsc.edu/ems/Music/tech_background/TE-16/teces_16.html).
Therefore the main difference from analogue systems is that digital recorders record the numbers in which sound waves have been converted into an hard disk,instead of recording them as a pattern of magnetization into a tape.
The more numbers are taken in a second the more accurate will be the sound recorded. That's why "When you sample the wave with an analog-to-digital converter, you have control over two variables:
- The sampling rate - Controls how many samples are taken per second
- The sampling precision (bit depth)- Controls how many different gradations (quantization levels) are possible when taking the sample"
The first digital devices could record at a maximum sample rate of 44,100 samples per record that was certainly a great result since the calculated simple rate through which a human ear perceives sound is 40 kHz , but nowadays it is possible to record even at higher sample rates,up to 192kHz.
A s a matter of fact a standard set commonly used nowadays is 48 kHz sample rate and 24 bit depth, for it is a good compromise between quality and usability. (http://www.bbc.co.uk/learningzone/clips/recording-sound-analogue-vs-digital/5977.htm)
However the first digital recorders weren't very good because ,although they could reach higher levels , the most of the times would record at a low sample rate and bit depth since the hard disks of these machines couldn't store big amount of data yet.
The first experiments undertaken with the aim to create good quality sound digital recorders were in Japan in the 1960's.Then in the 70s a few companies such as Mitsubishi ,Soundstream and Denon put on the market the first PCM digital recorders .
The digital consumer formats ,as well as the technologies applied in the digital recording devices ,have been subjected to many changes through the years before the advent of the Compact Disc, to begin with the Betamax VCRs and follow with the Digital Audio Tape (DAT),the Digital Compact cassette (DCC) and the Mini Disc.
With regard to the recording desk using VHS it has to be mentioned the famous ADAT recorder introduced in 1991 and still present nowadays.
However,at the present day computer based digital audio workstation (DAW) are the principal recording devices used, since the improvements reached by the computer science concerning the computers speed and storage capacity have permitted to achieve incredible results in terms of accuracy of sound never reached before, a sound even clearer than the one a human ear can perceive.
Moreover ,another advantage of using digital technology is that a digital record can be both copied and played back infinite times without having any loss of quality whereas an analog record couldn't.
In addition ,for what concerns editing and processing,it can be said that the digital era led to an authentic revolution with all the programs such as Pro Tools ,Ableton,Cubabase,Logic,etc able to make any sort of operations in a faster ,preciser and easier way in comparison to the old analogue operations made by hand.Furthermore a new world of sounds has been generated by these new technologies: software instruments, midi, samples...Electronic music has been subjected to an impressive development.
By now it is also very common to buy music directly from the web ,in digital formats such as MP3 or Wav. Maybe even the CD is going to disappear soon?
The transformation generated by the new digital recording technologies is really impressive also with regard to the home studios. As a matter of fact now everyone can create a personal home studio spending a very low amount of money .
But why, although the sound recording development produced by the advent of the digital technologies is undeniable ,are many people (myself included) still so moved by the peculiar and inspiring sound of the recordings of the 50's,60's and 70's? And why are many engineers working so hard to try to reproduce "vintage" sounds through digital software plug in and effects?
The Analogue Warmth
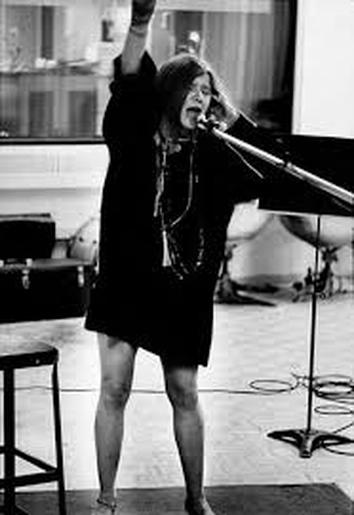
"When it comes to audio, some aspects of analogue technology introduce artifacts and distortions that are perceived as pleasant, and are often musically enhancing - and this is something that lies at the heart of the idea of ' analogue warmth'."(Hugh Robjohns 2010).This concept is very well explained in the Dave Grohl's documentary Sound City , where many artists who used to record in this amazing studio are asked to describe their experiences , focussing particularly on the main factors which made the sound coming out from this studio so interesting and exciting.This studio was indeed especially renown for its drum sound. This sound could be achieved thanks to two main factors: the room in which it was recorded and the Neve 8078 analogue console mentioned above.
These are indeed two important agents on the character of a recording , along with the type of instruments played, the musicians, the performances, the choice of microphones, processors and effects. As a matter of fact , when one speaks about "analogue warmth", one is referring mainly to the tape medium ,as in this case ,for instance, the Neve console ,along with"ribbon mics, monitor speakers, recording tape and many valve-stages dating from the 1950's and 60's " which "often had restricted high frequency performance and a fuller bottom end" and the way they were used as H.Robjohns ( 2010,p2) explains in his article "Analogue Warmth".
Furthermore, making a more detailed list of the main factors concerning just the warm sound of analogue recorders the same Robjhons wrote :" Magnetic recording tape and the mechanical artifacts of the tape machine itself, such as flutter and other speed -stability issues. Harmonic and non-harmonic distortions, such as those caused by transformers and inductors. Active circuitry, whether it includes valves (vacuum tubes) or solid-state devices."
Therefore now it would be easier to understand why many artists are still so interested in recording with analogue gear and why many engineers keep on working very hard to try to reach sounds similar to the ones of vintage classic records, using both analogue and digital equipments.
In conclusion I would like to quote again Hugh Robjohns (2010,p1) as I find his observation about the enjoyment of an artistic product an inspiring answer to the debate between analogue and digital and an interesting description concerning the mysterious nature of a moving work of art.
-"Enjoyment of an artistic product (be it a sound recording, a photograph, a film or whatever ) isn't necessarily about precision and accuracy : more often , it's about mood, character and subtle enhancements that make the end result more vivid and interesting than real life. " (Hugh Robjohns 2010)
Bibliography :
- David Morton,1998-2006 [Online] . Recording History available from : http://www.recording- history.org/HTML/tech.php
- Donald C. Davidson , [No date] [Online] . The Phonautograph and Precursors to Edison's Phonograph .available from : http://cylinders.library.ucsb.edu/history-early.php
- Wikipedia [Online] [No date]. History of sound recording. available from : http://en.wikipedia.org/wiki/Phonograph
- Gran Wythoff 2011 [Online]. The Scientific Adventures of Baron Munchausen. available from : http://wythoff.net/the-scientific-adventures-of-baron-munchausen/
- Audio Engineering Society 2013 [Online] Magnetic Recording History Pictures 2 available from: .
http://www.aes.org/aeshc/docs/recording.technology.history/tape2.html
- eil.com [No date] [Online] How vinyl is produced[making the record]. available from : http://eil.com/explore/guide/vinyl_making.asp
- Sound City. 2013 . Documentary directed by Dave Grohl
- Peter Elsea . 1996 [Online] Basic of digital recording . available from :
http://artsites.ucsc.edu/ems/Music/tech_background/TE-16/teces_16.html
- Unne Liljeblad [No date] . Digital vs.Analogue - Recording. [Online] available from : http://www.mix-engineer.com/audio-philosophy/digital-vs-analog-recording/
- Anon. [No date]. [Online] . available from:
http://www.mix-engineer.com/audio-philosophy/digital-vs-analog-recording/
- Hugh Robjohnson . 2010 [Online] . Analogue Warmth . available from:
http://www.mix-engineer.com/audio-philosophy/digital-vs-analog-recording/
